

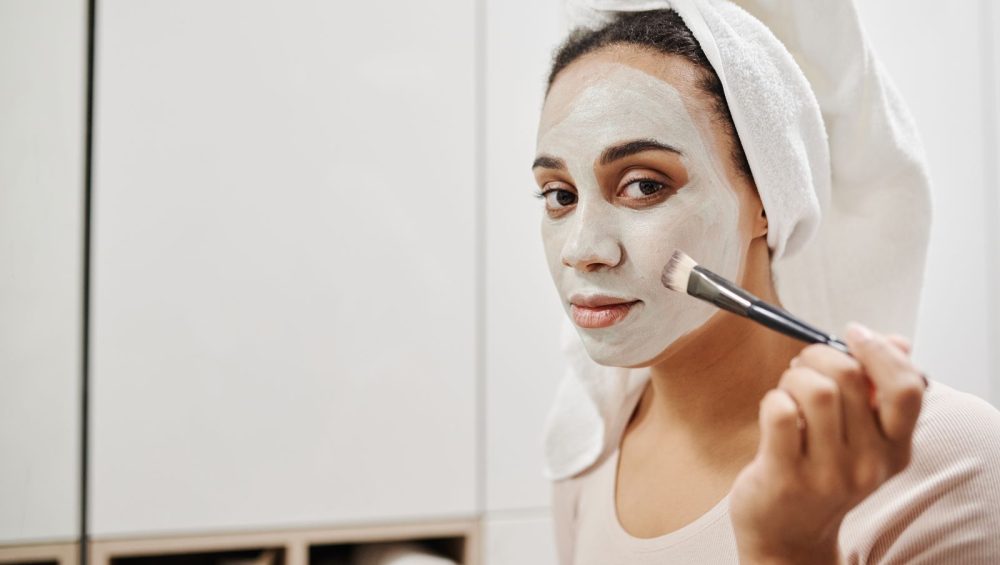
Short answer: Lift the product out of the jar with a cosmetic spatula onto a small dish, load a soft synthetic brush, and lay the mask on in short strokes working from the jaw upward and outward to the forehead, keeping clear of the eyelid and the lip line. The brush earns its place for three reasons: your fingers never enter the container, the layer goes on evenly instead of in patches, and you use less product. Remove the mask with a damp aesthetic facial sponge or gauze pad rather than by rubbing with your hands. Esenté’s preferred approach leaves facial scrubbing brushes out of the routine altogether.
A mask brush applies. It never scrubs. That is the whole distinction.
What a mask brush is, and what it is not
A mask brush is a soft, flat, tapered applicator. It carries product to the skin and spreads it. It does not exfoliate, it does not stimulate, and it does not generate friction. If you can feel the bristles working against your skin rather than gliding across it, the brush is wrong or you are pressing too hard.
It is not a cleansing brush, and the two get confused because both are called face brushes.
Facial scrubbing brushes — the motorized bristle heads sold for cleansing — have no place in an Esenté routine. Our position is that they are too harsh for facial skin, and that the irritation they can cause tends to produce exactly the redness and blotchiness people then try to treat with more product. That is Esenté’s preferred approach rather than a universal rule, but it is a firm one. The skin on your face is not the skin on your heels, and it does not need scouring to be clean.
Application and cleansing are separate jobs done with separate tools. A soft brush for putting product on. An aesthetic facial sponge or a gauze pad for taking it off.
Choosing one
Synthetic bristles. The structural difference is real: animal hair has a keratin cuticle and a porous shaft that takes up liquid, and synthetic filament does not. What follows from that is the practical case rather than a tested one — natural hair holds more of a wet formula inside the fiber, so less of it reaches your face, and it stays damp longer after washing. Synthetic filament picks up product on the surface and gives most of it back. We are not aware of a controlled study comparing contamination rates between the two in home use, so treat this as a sound inference from how the materials behave, not as a proven hygiene result. For anything wet — masks, gels, clay, serums — synthetic is the easier tool to keep clean and the less wasteful one.
Flat and tapered, not round and fluffy. A flat brush lays product down. A domed makeup-style brush stipples it, which is slower and less even. A slight taper at the tip gives you control at the hairline and around the nostrils.
Sized to your face, not to a professional trolley. A brush roughly the width of two or three fingers covers a cheek in a couple of strokes without overshooting onto the eyelid. Very wide brushes are built for treatment rooms and back-bar speed; at home they mostly deposit product where you did not want it.
Silicone applicators are a legitimate alternative for thick clay and cream masks. They are the easiest tool in the category to clean and waste almost nothing, but they do not feather product the way bristles do, so the edge of the layer is blunter. Either is fine. Fingers are the option we would leave out.
Before you load the brush: the spatula step
Do not dip the brush into the jar.
A brush that has touched your face and then goes back into the container carries skin oils, bacteria and moisture into a formula whose preservative system was tested against a defined contamination load, not an open-ended one. The brush is cleaner than a finger. It is not clean.
Use a cosmetic spatula to lift what you need onto a small dish, a saucer, or the back of your hand if the mask is going on immediately. Load the brush from there. Whatever is left on the dish is discarded — it never goes back in the jar. Use a clean spatula for any jar or container where fingers would otherwise enter the product.
Tubes and pumps are the exception, since nothing goes into them. Squeeze straight onto the dish or the brush.
How to apply, in order
Start with clean, dry skin. Cleanse in the evening with an aesthetic facial sponge or gauze pad, then follow with a toner or antioxidant spray — Esenté’s recommended preparatory step after every cleanse, treated as part of the routine rather than an extra. Blot dry before masking so the mask is not diluted on contact.
Then:
1. Load lightly. Draw the brush across the product so both faces of the bristles pick some up. A brush overloaded at the base drops product on your collar.
2. Work upward and outward. Start at the jawline and move up. Chin, jaw, cheeks, nose, then forehead last, because the forehead is the fastest area to cover and the one where product tends to run into the hairline if it has been sitting there for three minutes.
3. Short strokes, light pressure. An inch or so at a time, brush held at an angle rather than upright. The bristles should bend slightly. If they splay flat, ease off.
4. Follow the contour. Move along the shape of the face rather than across it — up the cheek toward the temple, out along the jaw. This is about coverage, not about lymphatic direction or any claim of stimulation. Even coverage is the entire goal.
5. Stop at the borders. Leave a clear margin around the eye socket — roughly a fingertip’s width outside the orbital bone — and stay off the lip line. Eyelid skin is thinner and more reactive than the rest of the face, and most masks are not formulated for it. Do not extend into the hairline or over the eyebrows unless the product instructions specifically say to.
6. Check the edges. Look in the mirror and pick up the misses: the sides of the nose, the crease beside the nostril, the front of the ears, the underside of the jaw. Those are the four places a mask is always thin.
How much is enough
Follow the application instructions for the individual mask — products differ in the layer they call for.
Unnecessary over-application wastes product: a layer thicker than the directions call for takes longer to dry, costs more per use, and makes a mess coming off. If the layer is holding its own shape and standing proud, you have likely gone past what the product needs and the extra is going down the sink.
Do not keep adding until it feels substantial. Check the product’s directions instead.
Timing and removal
Follow the time on the packaging and set a timer rather than guessing. Longer is not stronger. Clay and drying masks in particular become harder to remove and more likely to irritate once they have gone past dry into cracking, and a mask left on well past that point is commonly said to start drawing water back out of the skin’s surface — a plausible explanation rather than one settled by controlled study, and a reason to follow the timing on the packaging either way.
To remove: soften first with warm water, then lift the product off with a damp aesthetic facial sponge or a gauze pad in gentle sweeping passes. Rinse the sponge and repeat. No scrubbing, no circular buffing, and no washcloth used with force.
Then tone. Every removal counts as a cleanse, and in the Esenté routine a toner or antioxidant spray follows every cleanse. Continue into your usual evening steps from there — the full order for layering what comes next does not change because you masked.
Cleaning the brush
Every single use. A brush left with product in it becomes a damp reservoir, and the next application puts that reservoir on your face.
Rinse under lukewarm water, working the bristles between your fingers until the water runs clear. Add a drop of gentle cleanser once a week or after a clay or oil-based mask, lather, rinse thoroughly. Squeeze — do not wring — reshape the head with your fingers, and lay the brush flat on a towel with the bristles overhanging the edge, or hang it head-down.
Never dry a brush upright in a pot. Water runs down into the ferrule, where it sits against the adhesive holding the bristles in place, and repeated soaking of that joint is the common explanation for a head that starts shedding early. We have not found a published test putting a number on how long that takes, and it will depend on the glue and on how wet the brush gets — but the fix costs nothing, so there is no reason to run the experiment on your own brush.
Store it dry, out of the bathroom if you can. Steam and humidity are not kind to tools any more than they are to formulas.
Replace it when you see any of three signals: shedding that continues after a wash, bristles that no longer return to shape, or a ferrule that feels loose or looks stained at the base. There is no universal interval — it depends on how often you use the brush and how well you wash it. A well-treated synthetic brush lasts a long time. One dried upright in a bathroom does not.
Four mistakes worth avoiding
- Dipping the brush in the jar. The spatula exists for this.
- Pressing. The brush is a delivery tool. Avoid excessive pressure or unnecessary friction, particularly on sensitive or reactive skin.
- Masking over an uncleansed face. You are sealing the day onto your skin.
- Using one brush for everything without washing between. Clay residue in a bristle head contaminates a cream mask, and the reverse.
Frequently asked questions
Do you really need a mask brush?
It is not the reason a mask works, and we would rather say so than oversell a tool. What the brush gives you is an even layer, less product used per application, and — with a spatula — a container your fingers never enter. Those are hygiene and economy arguments rather than efficacy claims, and they are the honest reasons to own one. They are also good enough reasons.
Is a mask brush better than using your fingers?
For applying a mask, yes, on three counts: even coverage, no contamination of the container, and less waste. Fingers are warm, oily and carry bacteria, and they push product into the skin unevenly.
How do you clean a mask brush?
Rinse in lukewarm water after every use until the water runs clear, and use a drop of gentle cleanser weekly or after clay and oil-based masks. Squeeze out the water, reshape the head, and dry it flat or head-down. Never leave it upright in a pot — water in the ferrule loosens the glue and the brush starts shedding.
Should a mask brush be synthetic or natural hair?
Synthetic, for wet products. Animal hair has a cuticle and a porous shaft that takes up liquid; synthetic filament does not, so more of the product reaches your face and the brush dries faster after washing. That is a materials argument rather than a tested comparison of contamination rates, but it points one way and nothing points back.
How thick should a face mask be applied?
Follow the application instructions for the individual mask, since products differ. Applying more than the directions call for wastes product: it slows drying and makes removal harder.
Can you use a cleansing brush instead?
Not for this, and not in an Esenté routine. Facial scrubbing brushes are excluded from our recommended approach — our position is that they are too harsh for facial skin and can cause irritation and blotchiness. Apply with a soft brush; remove with an aesthetic facial sponge or gauze pad.
A tool is one of the few parts of a skincare routine you can judge without trusting anyone’s marketing, which is the same test that applies to everything else on the label.
About the author. Victoria Nash, founder of Esenté Skincare and Younger You Clinique, has been a licensed aesthetician since 2004 and is an experienced skincare educator.
Reviewed by Victoria Nash, licensed aesthetician and founder of Esenté Skincare & Younger You Clinique. This article is educational and is not medical advice.